-
[Unity 2D] Fly Bird 그라운드 이동 구현하기Unity 2D 2023. 3. 21. 23:31
저번 페이지에서는 Player 가 이동하고, 메인 카메라도 Player를 따라 이동하는 것을 구현해봤다.
이번엔 스페이스 키나 마우스 좌버튼을 클릭하지 않고도 Bird가 계속 날아다니는 것처럼 구현해보자.
(테스트 해야 하는데 계속 클릭 해야 하면서 테스트 하기 귀찮잖아~)
using System.Collections;
using System.Collections.Generic;
using UnityEngine;

public class Player : MonoBehaviour
{
    // Ready 구현
    [SerializeField] private float readyPower = 0.3f;
}
중력의 반대 힘을 이용해서 위치를 제자리인 것처럼 고정시킨다.
이 반대 힘은 readyPower에 저장한다.
void ReadyBird()
{
	// velocity.y가 0보다 아래일 때 readyPower 만큼 위로 이동한다
	if(rb.velocity.y < 0)
    {
    	rb.velocity = Vector2.up * readyPower;
    }
}
중력에 대응할 readyPower는 매 프레임마다 velocity값을 준다.
readyPower는 [SerializeField] 를 사용해서 인스펙터 창에서도 관리할 수 있도록 한다.
readyPower이 적절하게 맞지 않으면 Bird가 점점 위로 올라가거나 기울거나 내려갈 수 있기 때문이다.
using System.Collections;
using System.Collections.Generic;
using UnityEngine;

public class Player : MonoBehaviour
{
    // Ready 구현
    [SerializeField] private float readyPower = 0.3f;
    private bool isStart = false;
}
bool isStart를 이용해서 리턴하거나 메서드를 값으로 받는다.
void Update()
{
	InputBird();
    // 출발하지 않았으면
    if (isStart == false)
    {
    	// Ready 상태가 된다
        ReadyBird();
        return;
    }
 // 출발했다면 밑의 메서드 실행
    RotateBird();
    MoveBird();
}
이 Bird 는 ready 상태에 있다가 Start 하면서 동시에 같이 실제로 움직일 것이다.

플레이 했을 때 Bird가 제자리에서 날개짓을 하는 것을 볼 수 있다.
스페이스 키를 눌러보았다.

앗..!!!!!!
Bird가 올라가서 내려올 생각을 하지 않는다.. 그렇다... 버그다...
버그를 수정해보자........
먼저 생각해보면.. Bird가 어떤 상황일 때 내려와야 할까?
→ 시작 전 스페이스 키나 마우스 좌버튼을 클릭했을 때 시작해야 한다.
void InputBird()
{
	// 스페이스바 혹은 마우스 좌버튼을 눌렀을 때
	keyJump |= Input.GetKeyDown(KeyCode.Space);
	keyJump |= Input.GetMouseButtonDown(0);

	// Bird가 시작했을 때 내려오지 않는 버그 수정
	if(isStart == false && keyJump == true)
	{
		isStart = true;
	}
}
코드 수정 후 다시 플레이 해서 스페이스 키나 마우스 좌버튼을 클릭했을 때 정상 구현 되는 것을 확인할 수 있다.
자 자 자 그런데
막상 게임씬에서 보면 Bird가 그냥 제자리에서 움직이는 것처럼 보인다.
그 이유는 말 그대로 Bird 외에 아무 것도 움직이지 않기 때문이다.
움직이는 것처럼 보이기 위해서 그라운드를 이동하는 것처럼 구현해야 한다.

에셋 폴더에 있는 ground 이미지 드래그 → 하이라키 창에 놓기
그라운드를 하나 더 복사해서 크기를 늘린 뒤 계속 좌우로 롤링시켜서 계속 움직일 수 있도록 할 것이다.
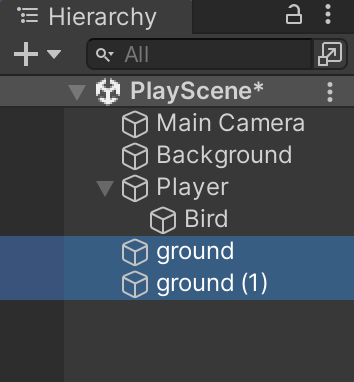
Ctrl(혹은 cmd)+D = 복사하기

복사한 ground 2개를 이어서 붙였다.


나중에 거리 계산이 수월하도록 맨 왼쪽 ground 기준 x좌표를 0으로 만들었다.
그 다음 이어져있는 두번째 ground는 자동적으로 x좌표가 8.4가 된다.

빈 오브젝트를 생성해서 이름을 Grounds라고 리네임한다. Transform 리셋은 당연히 필수다.
그 안에 ground 이미지 2개를 넣어 상속시키고 관리한다.

이 Grounds도 결국 화면이 움직일 때 같이 움직여줘야 하니까 Main Camera에 상속시킨다.

그라운드는 왼쪽으로 반복해서 움직이게 한다.
이때 그라운드의 반복 구간은 자기 자신의 왼쪽 끝에서부터 오른쪽 끝이다.
이 계산을 쉽게 하기 위해 첫번째 그라운드의 x좌표를 0으로 맞추고
두번째 그라운드의 x좌표는 8.4로 맞춰 놓은 것이다!
Grounds의 움직임을 구현하기 위해 스크립트를 만든다.
using System.Collections;
using System.Collections.Generic;
using UnityEngine;

public class Ground : MonoBehaviour
{
	// Grounds가 움직일 속도 초기화
	[SerializeField] private float moveSpeed = 5f;

    void Update()
    {
    	MoveGround();
    }

    void MoveGround()
    {
    	// Grounds가 왼쪽으로 moveSpeed만큼 움직이도록 구현
    	transform.Translate(Vector2.left * moveSpeed * Time.deltaTime, Space.World);
    }
}
반복되게 해보자.
Grounds의 position.x 가 -8.4가 되었을 때 다시 position.x 가 8.4로 되돌아갈 수 있도록 구현해본다.
using System.Collections;
using System.Collections.Generic;
using UnityEngine;

public class Ground : MonoBehaviour
{
	// Grounds가 움직일 속도 초기화
	[SerializeField] private float moveSpeed = 5f;

    void Update()
    {
    	MoveGround();
    }

    void MoveGround()
    {
    	// Grounds가 왼쪽으로 moveSpeed만큼 움직이도록 구현
    	transform.Translate(Vector2.left * moveSpeed * Time.deltaTime, Space.World);
        if(transform.localPosition.x < -8.4f)
        {
        	transform.localPosition = new Vector3(transform.localPosition.x + 8.4f, transform.localPosition.y, transform.localPosition.z);
        }
    }
}
만약 x좌표가 -8.4보다 작아지면 현재 로컬포지션에서 +8.4를 더해서 다시 0의 위치로 돌아갈 수 있도록 구현했다.
이때 그라운드 오브젝트는 메인카메라 부모에 존속된 상태이기 때문에 transform.localPosition 이라고 명칭을 바꿔야 한다.
여기서 position 과 local position 의 차이를 알아보자.
position 은 오브젝트의 위치를 기준으로 좌표가 설정된다.
그래서 오브젝트의 좌표와 실제 transform의 좌표가 다를 수 있다.
localposition 은 부모의 위치를 기준으로 공간 안에서 좌표가 설정된다.
그래서 오브젝트의 좌표와 실제 transform의 좌표가 일치한다.

플레이 했을 때 반복적으로 Grounds가 움직이는 것을 볼 수 있다.
전체 코드
↓
더보기Player.cs
using System.Collections;
using System.Collections.Generic;
using UnityEngine;

public class Player : MonoBehaviour
{
	Rigidbody2D rb;

	// Jump 구현
    [SerializeField] float Speed = 5;
    private bool keyJump = false;

    // Rotate 구현
    private Vector3 birdRotation;
    [SerializeField] private float upRotate = 5f;
    [SerializeField] private float downRotate = -5f;

    // Move 구현
    [SerializeField] float moveSpeed = 5f;

    // Ready 구현
    [SerializeField] private float readyPower = 0.3f;
    private bool isStart = false;

    void Start()
    {
    	// RigidBody2D 컴포넌트를 rb라는 변수를 통해 가져온다
        rb = GetComponent<Rigidbody2D>();
    }

    void Update()
    {
    	InputBird();
        // 출발하지 않았다면
        if(isStart == false)
        {
            ReadyBird();
            return;
        }
        // 출발했다면 밑의 메서드 실행
        RotateBird();
        MoveBird();
    }

    private void FixedUpdate()
    {
    	// 입력받은 Jump값이 true라면
    	if(keyJump == true)
        {
        	// JumpBird메서드 받기
        	JumpBird();
            // 그리고 다시 keyJump값은 false로 만들어준다.
            keyJump = false;
        }
    }

    void ReadyBird()
    {
        if (rb.velocity.y < 0)
        {
            rb.velocity = Vector2.up * readyPower;
        }
    }

    void JumpBird()
    {
    	// RigidBody2D의 Velocity는 Speed만큼 올라간다
        rb.velocity = Vector3.up * Speed;
    }

    void RotateBird()
	{
		// Rotate값을 저장할 변수를 초기화했다
		float degree = 0;

    	// 점프해서 올라갔을 때 +30도까지 회전한다
    	if(rb.velocity.y > 0)
    	{
    		degree = upRotate;
    	}

    	// 점프 후 내려갈 때 -90도까지 회전한다
    	else if(rb.velocity.y < 0)
    	{
    		degree = downRotate;
    	}

    	// birdRotation은 transform 이기 때문에 오일러 값으로 변환해 적용시켜준다
    	birdRotation = new Vector3(0,0,Mathf.Clamp((birdRotation.z + degree), -90, 30));
    	transform.eulerAngles = birdRotation;
	}

    void MoveBird()
    {
    	transform.Translate(Vector3.right * moveSpeed * Time.deltaTime, Space.World);
    }

    void InputBird()
    {
    	// Jump를 입력받는 메서드를 따로 생성했다.
    	// 스페이스바 혹은 마우스 좌버튼을 눌렀을 때
        keyJump |= Input.GetKeyDown(KeyCode.Space);
        keyJump |= Input.GetMouseButtonDown(0);

        // Bird가 시작했을 때 내려오지 않는 버그 수정
        if(isStart == false && keyJump == true)
        {
            isStart = true;
        }
    }
}
Ground.cs
using System.Collections; using System.Collections.Generic; using UnityEngine; public class Ground : MonoBehaviour { // Grounds가 움직이는 속도 초기화 [SerializeField] float groundSpeed = 5f; void Update() { MoveGround(); } void MoveGround() { // 왼쪽으로 움직이는 것 구현하기 transform.Translate(Vector2.left * groundSpeed * Time.deltaTime, Space.World); if(transform.localPosition.x < -8.4f) { transform.localPosition = new Vector3(transform.localPosition.x + 8.4f, transform.localPosition.y, transform.localPosition.z); } } }'Unity 2D' 카테고리의 다른 글
[Unity 2D] Fly Bird 파이프 프리팹 Spawn하기 (2) 2023.03.23 [Unity 2D] Fly Bird 프리팹 구현하고 Collider 적용하기 (0) 2023.03.23 [Unity 2D] Fly Bird 플레이어 따라 Camera 이동 구현 (0) 2023.03.21 [Unity 2D] Fly Bird 회전 구현하기 (1) 2023.03.21 [Unity 2D] Fly Bird 플레이어 이동 구현하기 (0) 2023.03.21